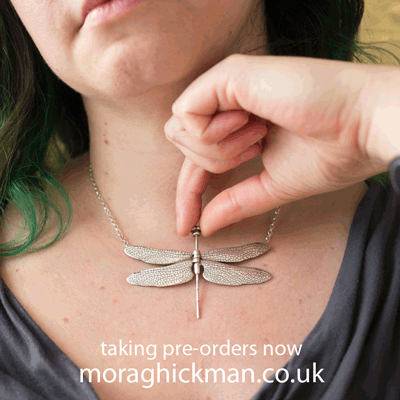
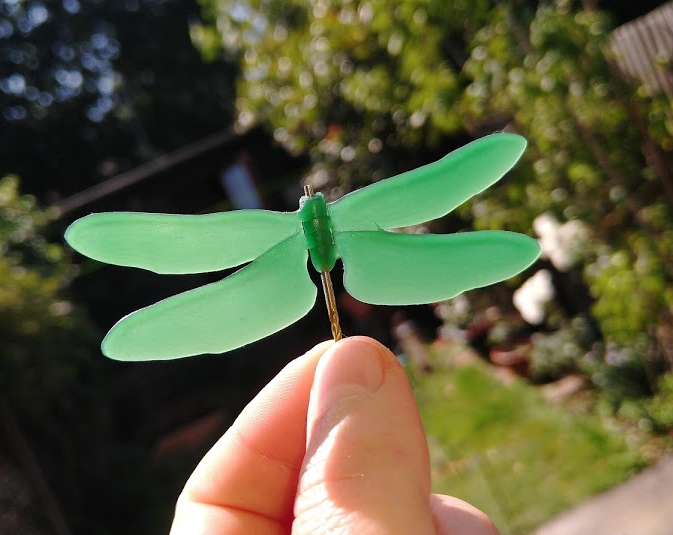
Paul came to me looking for a dragonfly-themed piece, as an extra-special gift for his wife’s significant birthday. It seemed the perfect excuse to revisit my hinged dragonfly pendant concept from 2008, but in my now favourite medium – wax carving and casting. As discussing various design options, we chose a theme of stylised realism, with moving, articulated wings and with the dragonfly’s body itself as the clasp pin.
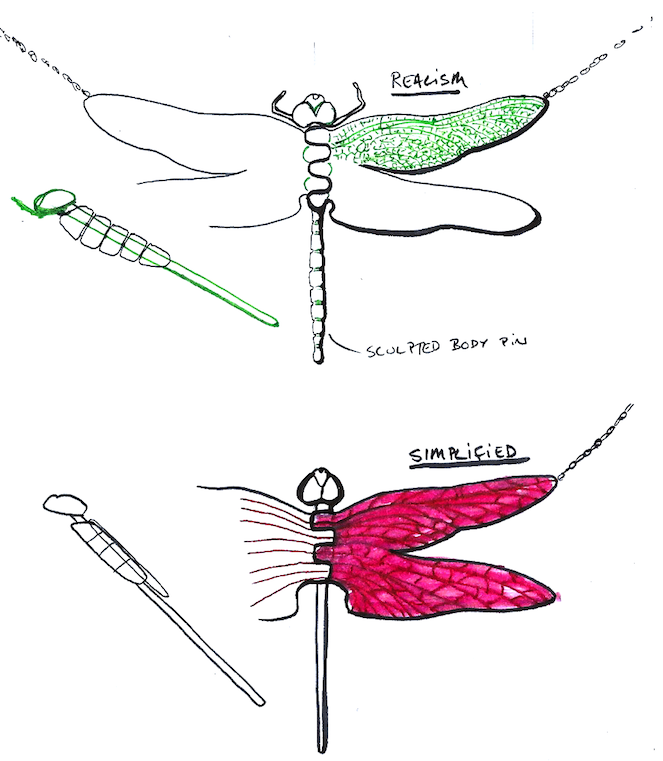
I began as usual by researching the subject, including looking at close-up images of dragonfly wings. I simplified the body plan, omitting the deep keel and legs to streamline the design and ensure the piece would sit well against the wearer’s body. I planned for it to be 80mm (3”) wide – not quite matching the largest I’ve seen in the wild, but certainly substantial enough to be a statement piece without overwhelming the wearer.
I started construction with the head and body, by threading thin slices of wax onto a drill bit and carving, filing and sanding them as a single piece. I use a ‘wax pen’ – a small battery powered hot wire – to melt and weld wax scraps together. This allowed me to build up the shape of the head for sculpting.
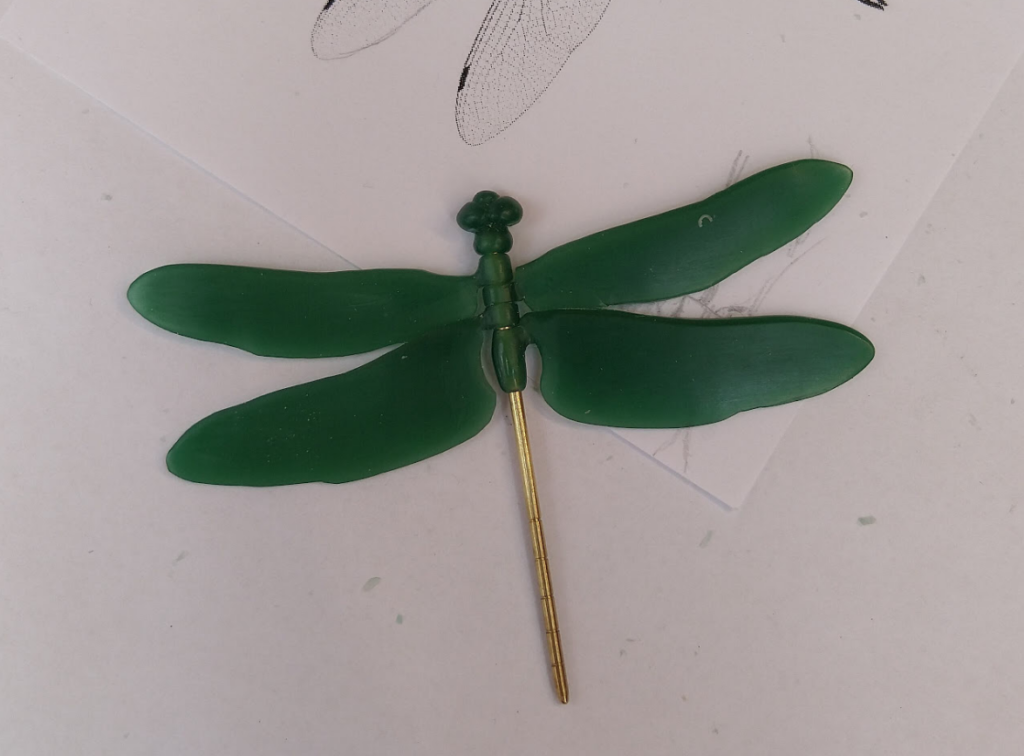
paper wings
I glued design printouts onto slabs of wax, cut the wings out roughly then carved them down to the final size. Continuing to work in 2D I thinned the wings down to about 3mm overall, then welded them onto the wax body.
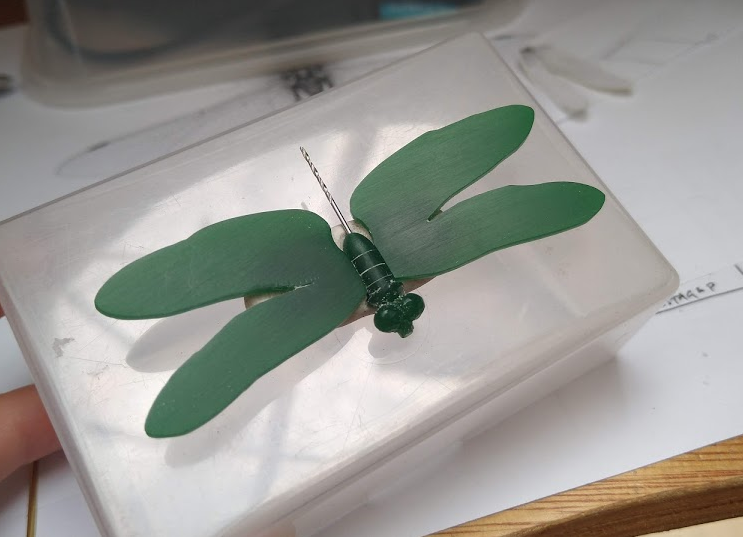
At this point I began sculpting the wings to be 3D. I wanted to echo the independent, twisting movement of a dragonfly’s wings, without compromising the structurally important overlap. I got the wings down to 1mm thick, with a 2mm ridge at the leading edge for stiffening and to reinforce the overlap.
I held the wax up to the light frequently as I worked – you can see by the tone how the thickness varies, and if different parts match. It is also very helpful for spotting stress cracks in time to patch them with a tiny weld.
Once I had the weight and shape of the wings refined, I worked on the body. I drilled out the core to its final size, and used a brass test pin to ensure the proportions were pleasing.
I rounded the individual knuckles of the hinge, reducing friction and creating a stylised, segmented look. I extended the final segment to better mimic a real dragonfly, with the added benefit of extra stability for the hinge.
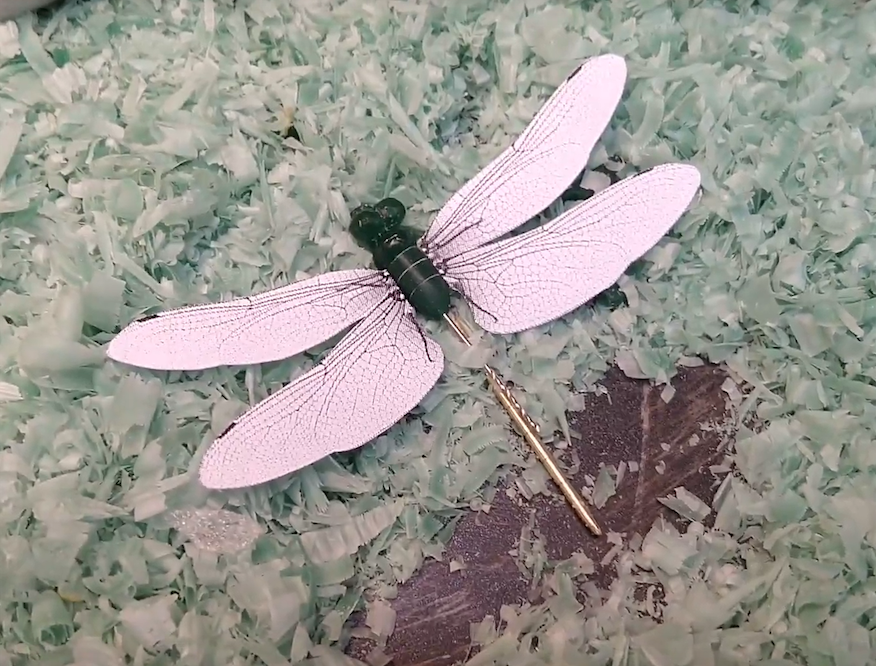
Now for the fun part – detail! As the dragonfly was near life-sized, I had the room to replicate the pattern at life-size. I used techniques I’d honed carving scales onto some of my dragon pieces, which looks especially good when highlighted with a dark patina against a bright polish. I copied the wing’s main structural lines onto the wax with a fine marker, then VERY CAREFULLY scribed the vein lines with a pointed tool.
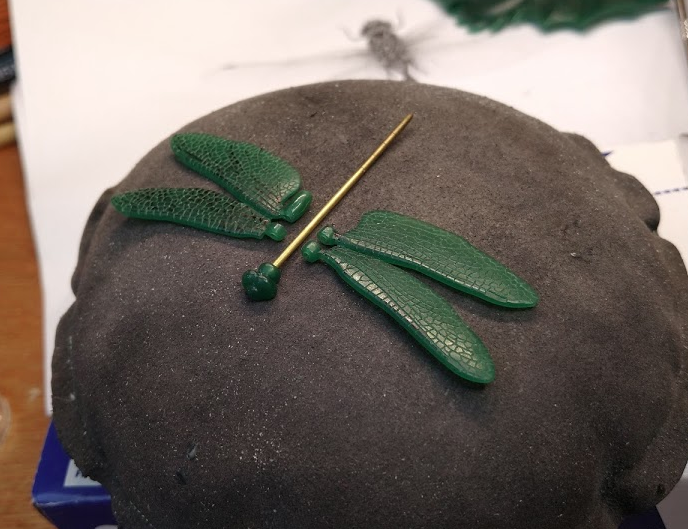
I welded on very fine loops for attaching the chain to the back of the wings, and that was the piece ready to send to the caster.
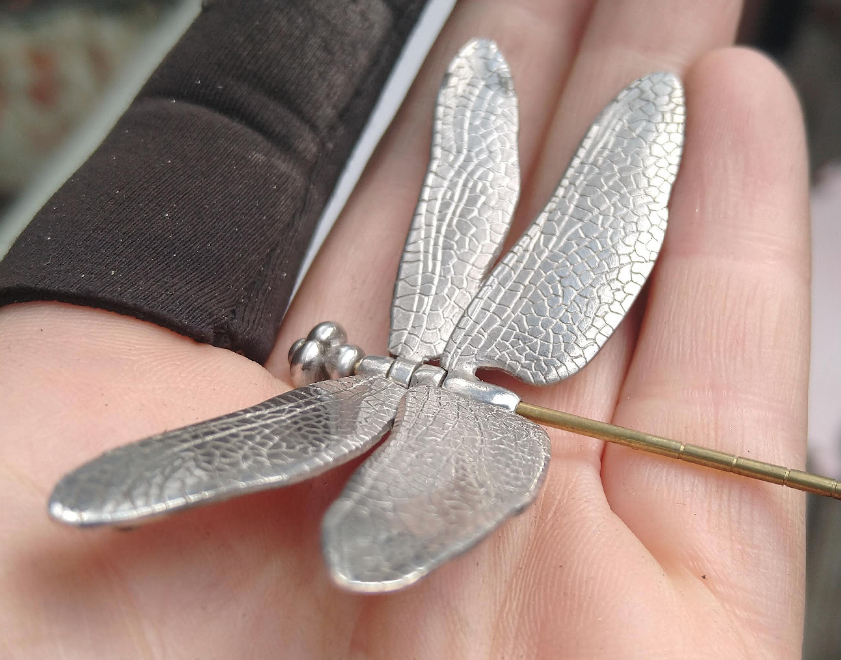
I was delighted with the parts when they came back, requiring minimal clean-up to get the hinge fitting and working. The fabrication was largely routine, except for shaping the pin. I wanted to add some textural detail to the tail, help sell the illusion and integrating it with the body portion. Dragonfly bodies are quite varied, so I selected elements that would work within the constraints, and took a few liberties. I used my drill as a lathe, supporting the piece with a (well protected) finger or two as I filed and sanded it to shape. Once complete, I soldered it into a socket in the cast head.
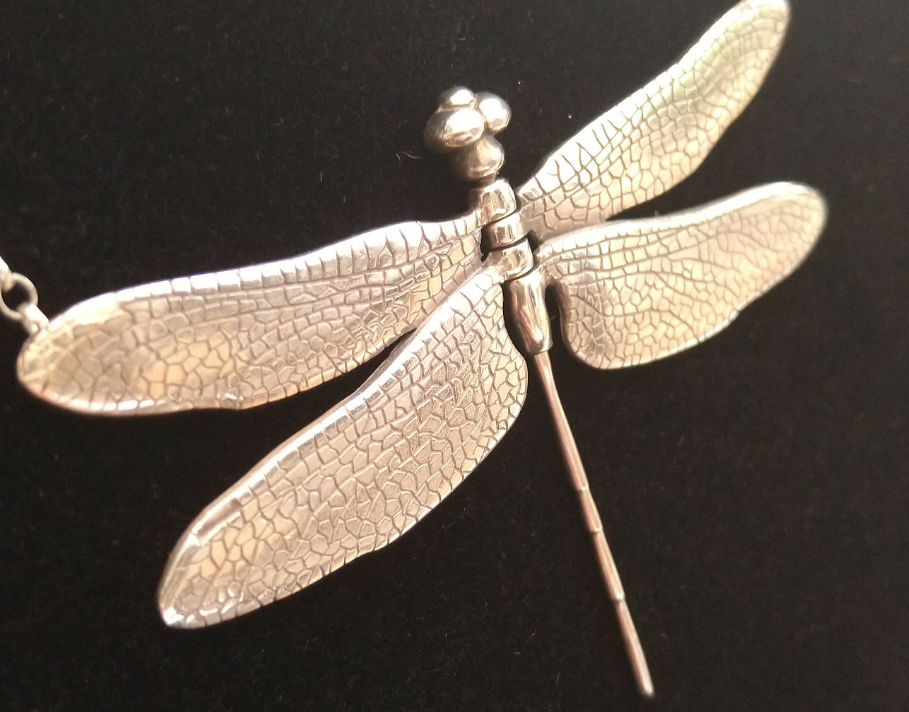
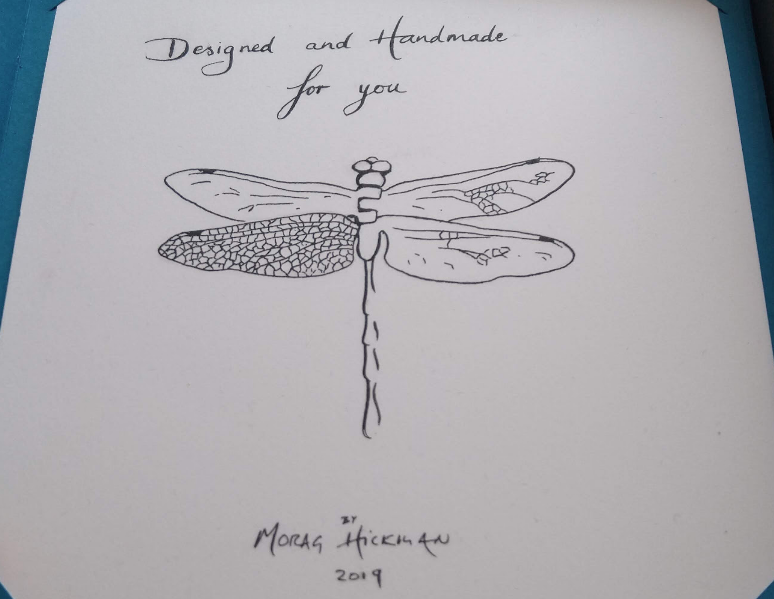
Oxidising the piece brought out all the details just as I hoped, and it’s ended up a really eye-catching piece. At the commissioner’s request I added a card with a sketch, to make sure that the recipient knew he’d had it especially made.
I’m happy to say she was delighted with her new piece! I’d love to do more dragonfly-textured pieces in future.
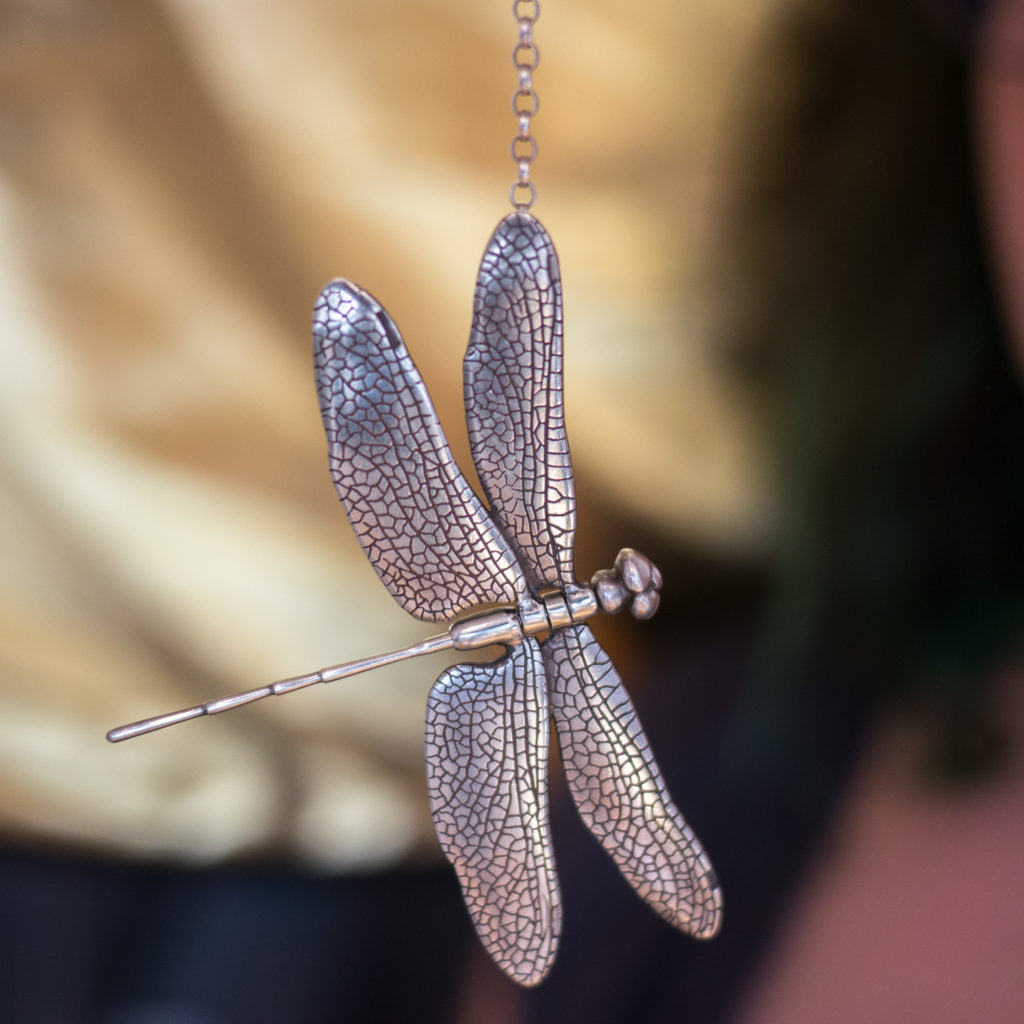
Thanks to Paul’s patronage, I’m delighted to offer this piece for general sale and shipping worldwide.
It’s available to pre-order in my shop now, shipping in time for Christmas – for more info and photos of the finished piece, visit the shop page here: